
Docs First Android app
Your first Android app#
From an installed Tomacco to a Jetpack Compose app running on the Android Emulator, with a
screenshot, a tap checked from outside the app and a passing UI test. Every step is one
tomaccoctl call; an agent makes the same calls over MCP.
On this page (10)
How long it takes. On the development host, with the Android SDK, the system image, a JDK
and Gradle's dependency cache already present, steps 2 to 8 below took 103 seconds, from
configuring the tools to a passing UI test. A first run downloads more: about 5 GB for the SDK
and emulator image in tomaccoctl setup, and Gradle's Compose dependencies at the first build.
Those downloads were not timed.
1. Install and set up#
curl -fsSL https://tomacco.dev/install.sh | bash
tomaccoctl setup
Say yes to Android in tomaccoctl setup: it installs the SDK and an emulator called Tomacco.
Getting started has the other ways to install, and
route C the manual Android setup.
The timed run used its own state directory, TOMACCO_HOME=/absolute/tutorial-home, so it left the
regular emulators and settings alone. You can do the same; leave it out to use your normal setup.
2. Check what this computer can do#
tomaccoctl call capabilities '{}'
Under android, build, emulator and devices should each say "ready": true. emulator
also lists the emulators you have under avds. If something is not ready, its missing names
what, and tomaccoctl doctor says how to fix it.
If you already pointed Tomacco at an SDK, JDK and Gradle elsewhere, settings.configure does it
in one call:
tomaccoctl call settings.configure '{"android_sdk":"/absolute/Android/Sdk","java_home":"/usr/lib/jvm/default","executables":{"gradle":"/usr/bin/gradle"}}'
3. Start an emulator#
tomaccoctl setup made one called Tomacco. To make another, name an installed system image and
a phone profile from tomaccoctl call catalog.list:
tomaccoctl call android.avd_create '{"name":"FirstRun","system_image":"system-images;android-36;google_apis;x86_64","profile_id":"pixel-11"}' --wait
tomaccoctl call android.avd_start '{"name":"FirstRun","headless":true}'
--wait follows a job until it ends and prints the final job. android.avd_start returns at
once: the emulator runs as a job for as long as it is up, so do not wait for that job. Instead
repeat device.list until the emulator is listed with "state":"device"; it is usually
emulator-5554. In the timed run that took about 20 seconds. Leave out headless to see the
emulator's window.
tomaccoctl call device.list '{"platform":"android"}'
4. Create the app#
tomaccoctl call project.create '{"path":"/absolute/FirstApp","kind":"compose","name":"FirstApp","organization":"dev.example"}'
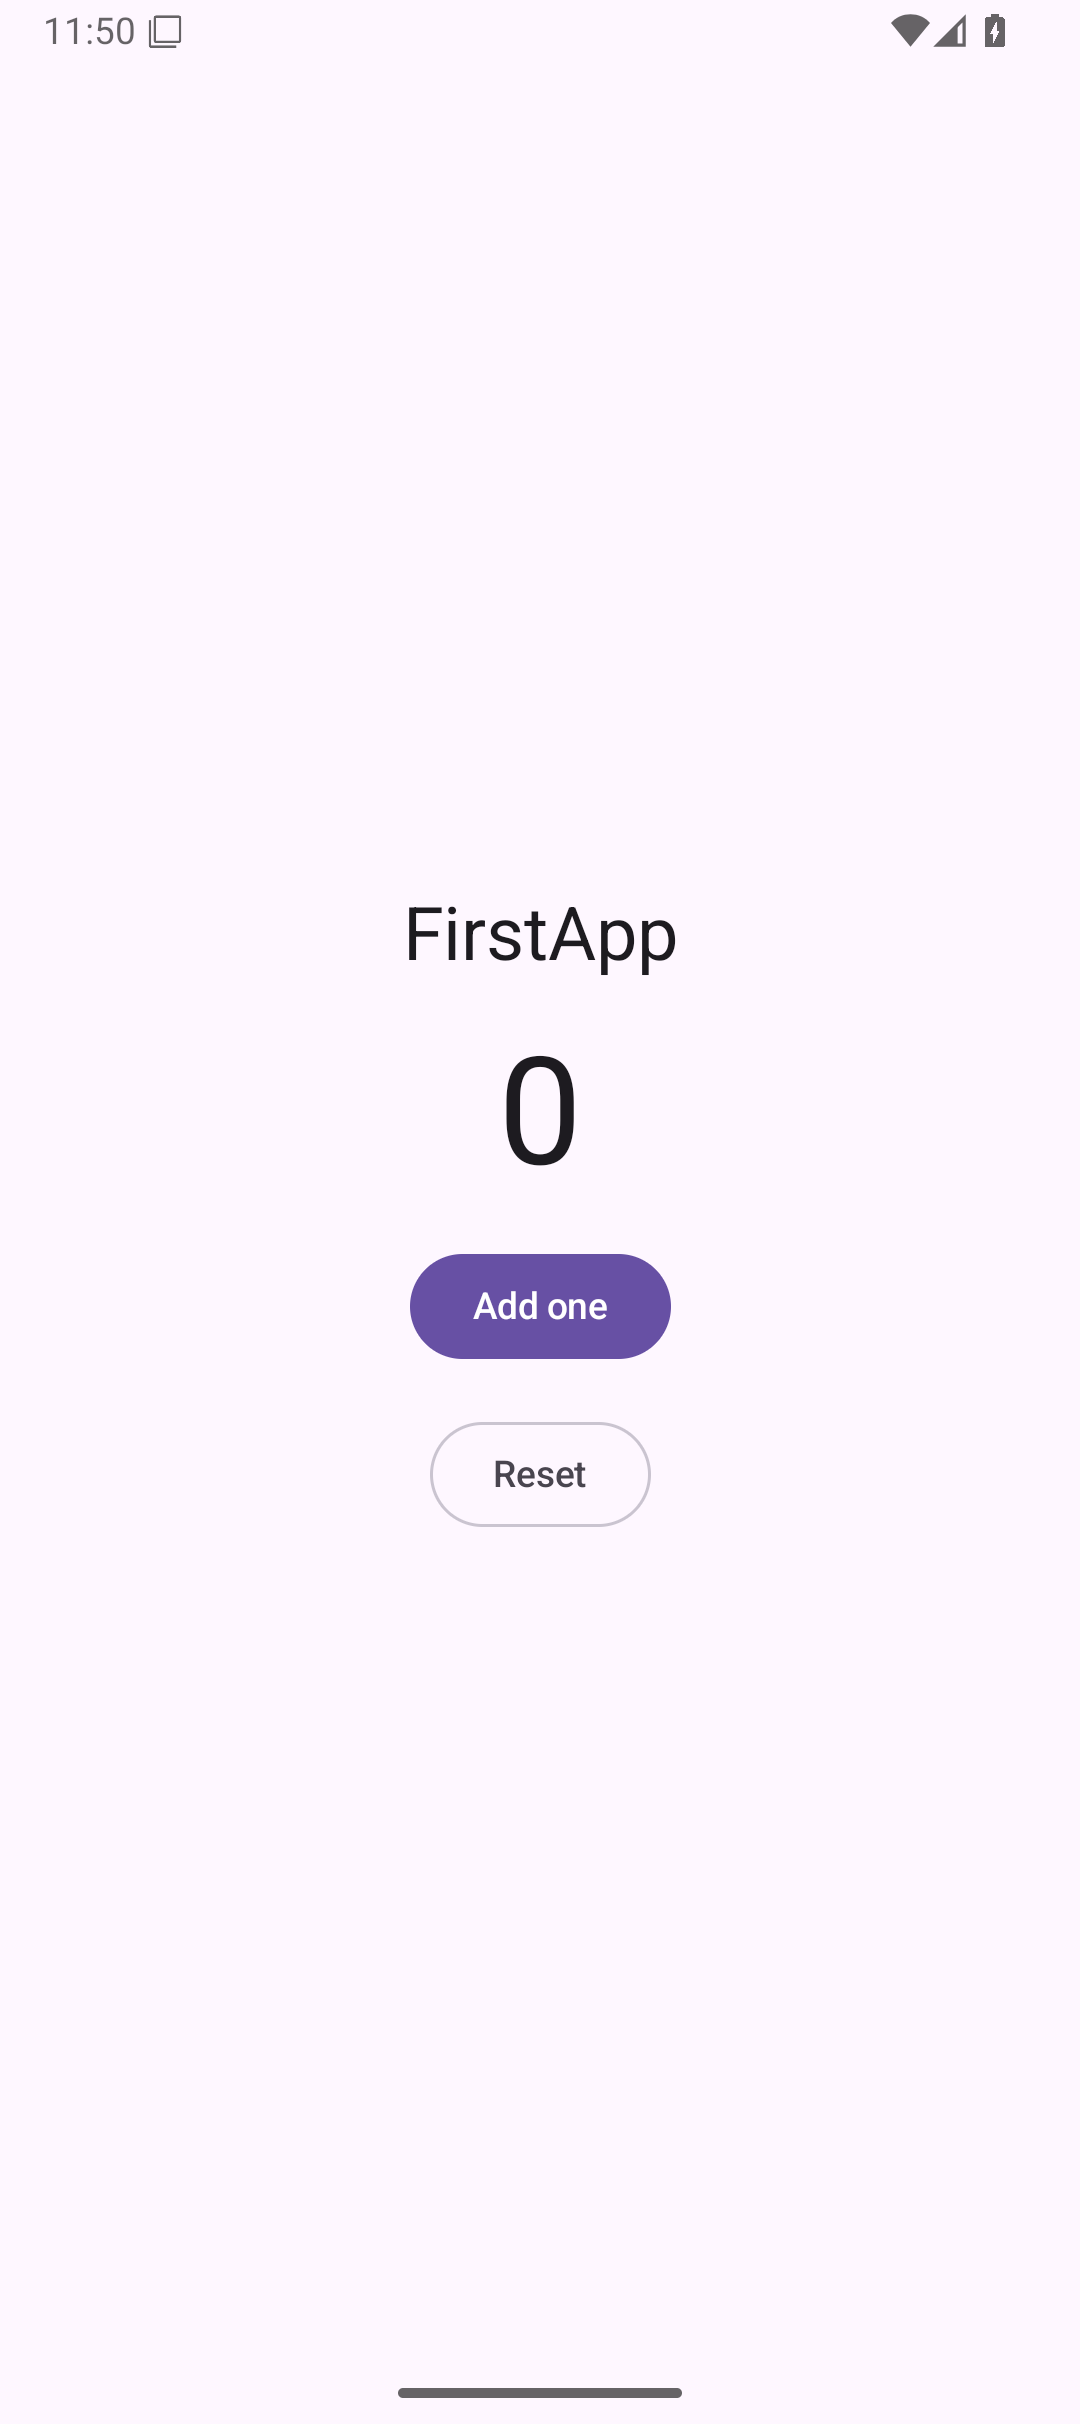
This writes a Kotlin and Jetpack Compose app with a versions catalog: a counter with Add one
and Reset, and one Compose UI test in app/src/androidTest. The result names its
application ID, dev.example.firstapp.
5. Build and run it#
tomaccoctl call project.run '{"path":"/absolute/FirstApp","platform":"android","device":"emulator-5554"}' --wait
The job runs Gradle's installDebug and then launches the app. Its log goes to standard error
while it runs; standard output gets the finished job, "state":"succeeded". Without --wait, as
an agent over MCP would, keep result.id and repeat job.wait until the state is succeeded,
failed, cancelled or timed_out:
tomaccoctl call job.wait '{"job_id":"JOB_ID","seconds":60}'
6. Take a screenshot#
tomaccoctl call device.capture '{"platform":"android","device":"emulator-5554","path":"/absolute/first.png"}'
The result has the file's path, size and SHA-256. This is the screenshot from the timed run:
7. Tap it and check the result#
Find controls by their text instead of coordinates:
tomaccoctl call testing.action '{"device":"emulator-5554","selector":{"text":"Add one"},"action":"click"}'
tomaccoctl call testing.find '{"device":"emulator-5554","selector":{"text":"1"},"timeout":5}'
testing.find answers the matching elements under matches, with their bounds; an empty list
after the timeout means the counter did not change.
8. Run the UI test#
tomaccoctl call project.execute '{"path":"/absolute/FirstApp","platform":"android","action":"instrumented-test"}' --wait
Gradle builds the test APK and runs CounterTest on the emulator. Then read the results as one
summary, passing the test job's id so that results of an earlier run are not counted:
tomaccoctl call testing.results '{"path":"/absolute/FirstApp","job_id":"JOB_ID"}'
In the timed run it answered "passed":true with "tests":1,"passed":1,"failed":0. A failure
lists the test, its message and its stack under failures.
9. Clean up#
Stop the emulator:
tomaccoctl call android.emulator '{"device":"emulator-5554","action":"stop"}'
With a separate TOMACCO_HOME, deleting that directory removes the emulator made in step 3 and
the job records. The project is an ordinary Gradle project; open it with
tomacco --project /absolute/FirstApp or in Android Studio.
Where next#
- Recipes: short sequences for the next things to try.
- Agent patterns: how an agent plans, waits and recovers with the same calls.
- Android: the live view, debugging, settings for tests and profiling.
- Troubleshooting when a step fails: read the error's
messageandremedyfirst.